

Can I Upload A Large Video To 4chan
Contents
- 1 Full general info
- 1.1 4chan and 8chan Limitations
- 2 Converting with ffmpeg
- two.i Control line options
- 2.one.one The basic command
- 2.1.two A more than detailed ffmpeg command
- 2.2 How seeking works in ffmpeg
- 2.iii Calculating the best bitrate to fit within the size limit
- 2.4 2-pass encoding
- 2.5 Using filters with -vf
- two.i Control line options
- 3 Mutual applications of ffmpeg
- 3.1 Metadata
- 3.2 Extract a snippet of video
- iii.3 Resizing
- 3.4 Hardsubbing
- 3.5 Cropping
- three.half-dozen Joining clips together
- 3.7 Reverse a video
- 3.eight Downloading from Youtube
- 4 More advanced ffmpeg utilise
- 4.i Manipulating individual video, audio and subtitle streams
- five General tips
- six Bug
- 6.1 Seeking outcome with VP9
- vii Scripts and GUIs
- vii.1 Windows
- seven.2 Linux / Os X
- 8 GUI options
- 8.1 Recorders
- 8.2 Converters
- nine External resources
- 9.1 List of stickies / test threads
- 9.2 Farther links
WebM support was introduced to 4chan in 2014. WebM is an open, royalty-free, media file format designed for the web.
WebM defines the file container structure, video and audio formats. WebM files consist of video streams compressed with the VP8 video codec and audio streams compressed with the Vorbis audio codec. The WebM file structure is based on the Matroska container.
This wiki page is meant to serve as an instructional tool to help you become started converting your content to WebM for posting.
Full general info
Run across a list of useful archived 4chan threads further downwardly the folio
4chan and 8chan Limitations
Current limits for WebM files on 4chan are:
- Maximum file size is 4096KB for /gif/ and 6144KB for /wsg/.
- Maximum duration is 300 seconds (v minutes).
- Maximum resolution is 2048x2048 pixels.
- No audio streams except on /gif/ and /wsg/. (utilize -an)
- Both boards crave Vorbis sound codec
- Only VP8 is supported, no VP9.
Current limits for WebM files on 8chan are:
- Maximum file size is 8192KB. (NOTE: Some boards have custom upload size)
- Maximum resolution is 10000x10000 pixels.
- Audio streams permitted globally.
Converting with ffmpeg
Annotation: avconv and ffmpeg are non entirely drop-in replacements. Make sure you know which one you lot are using.
Bone Ten Users: The homebrew version of ffmpeg doesn't include webm support by default, try brew install ffmpeg --with-libvpx.
Command line options
The basic command
-
ffmpeg -i input.mkv output.webm
Wow! Is it really that easy? Yes. Yes it is. Yet, this will give you a really shitty webm that everyone will mock yous for. You might equally well be posting gifs. In society to make expert quality webms, nosotros demand to add extra options to fine-tune information technology.
First, let'south examine the structure of an ffmpeg command:
-
ffmpeg
- Starts the ffmpeg program you take on your computer. Pretty straightforward.
-
-i input.mkv
- The file you lot want to convert. You always need an -i in front. If the filename has spaces you need to enclose it in quotes:
-i "my file.mkv"
-
output.webm
- The proper noun of the converted webm.
A more detailed ffmpeg command
ffmpeg -i input.mp4 -c:v libvpx-vp9 -b:v 1M -c:a libvorbis output.webm
This may wait intimidating but it is not all that bad. Allow'southward expect at the different parameters:
- -i: Specifies the input file, which you're converting to some other format.
- -c:v Specifies the video codec to use. webm isn't actually an encoding type unto itself, only an audio/video container, like mkv.
All the same, you lot volition almost always use libvpx for the video.VP8 has been succeeded by VP9, but VP9 is not (yet) supported on 4chan. If you want to use VP9 anyway, y'all must use "libvpx-vp9", as "libvpx" will utilize VP8 instead. - -b: Sets the target bitrate. -b:v sets video bitrate and -b:a sets audio. Merely employ this option if yous desire a constant bitrate, which volition produce a college quality file. If you are looking for a smaller file size, consider leaving this out.
- -c:a: Specifies the sound codec to utilise. Some options include libvorbis, libmp3lame, etc. If you lot are unsure stick with libvorbis. As libopus is capable of lower filesizes at very low bitrates, if you are using an audio bitrate of, for example, 64K, you may consider using libopus instead of libvorbis.
Other useful options:
- -threads: Tells ffmpeg to use multithreading, speeding up the encoding process. Enter the number of cores your processor has -one as a parameter (for quadcore, employ -threads 3)
or put 0 to apply them all. VP8 and VP9 cannot automobile-discover the amount of cores your processor has, so using -threads 0 is equivalent to using -threads one. Be aware that using multithreading may slightly lower output quality and have the upshot that echo encodes do not accept identical results. - -air-conditioning: Sets number of audio channels, normally 2 or ane. Sometimes setting to i will give you lot a smaller filesize. You should probably non bear on this unless you know what y'all're doing.
- -an: Disable audio. Utilize when converting .gif files to .webm.
- -sn: Disable subtitles.
- -ss: Seeks to a position in the file. Useful for cut out small scenes. Takes time in seconds equally a parameter or HH:MM:SS syntax. use -t in tandem to ready the file duration. For example,
-t 00:00:10cuts out the first x seconds of the video for conversion, and-ss 00:00:10 -t 00:00:xwould skip the first ten seconds and cut out the next 10 for conversion. - -speed: Controls the speed at which the video is encoded. Faster speeds come at the expense of lower quality and larger filesizes. Use -speed 0 for maximum quality and lowest filesizes.
- -qmin and -qmax: Tells ffmpeg what "quantization parameter" to use when assigning quality. Don't worry if you don't know what a quantization parameter is, considering neither do I. All I know is that lower numbers = better quality. I believe the -qmax selection prevents the quality from dropping below a sure level for any given frame, and so the overall video quality will be more consistent (it prevents you from getting certain frames in your video which are of absolutely dreadful quality where everything is blocky every bit fuck, basically). Recommended values: -qmin 0 -qmax l
- -crf: Sets CRF value. Must be from four-63 in VP8, or 0-63 in VP9. Lower is college quality. x the recommended setting. There are two means of using CRF - ane) "Abiding Quality" mode, ii) "Constrained Quality" mode.
- 1) To use constant quality mode, you MUST use a value of "0" when specifying the video bitrate (-b:five 0). If you merely remove the "-b:v" option altogether, ffmpeg will simply fall back on the default bitrate (256K, I think), which will result in a constrained quality encode with extremely poor quality. Constant quality fashion tries to reach a... well... constant level of quality, using whatever bitrate is necessary to achieve that level of quality. This can result in very large file sizes, so is mostly not suitable for making webms intended for imageboards which typically have a file size limit of 10MB or less. Case command:
ffmpeg -i input.mp4 -c:v libvpx-vp9 -crf ten -b:v 0 -c:a libvorbis output.webm - 2) To apply constrained quality mode, you must specify both a CRF value (due east.k. -crf 10) AND a video bitrate value (e.chiliad. -b:v 1M). Constrained quality fashion volition endeavour to achieve a certain level of quality, simply without going over a specified bitrate level. When -b:v is used without -crf, the value of -b:v is a target bitrate, but when -b:v and -crf are used together, -b:five becomes a maximum bitrate. This is a mode of achieving high quality while all the same retaining control over the filesize. Ideally it should be used with the 2-pass encoding method. Example command:
ffmpeg -i input.mp4 -c:v libvpx-vp9 -crf 10 -b:v 1M -c:a libvorbis output.webm
- 1) To use constant quality mode, you MUST use a value of "0" when specifying the video bitrate (-b:five 0). If you merely remove the "-b:v" option altogether, ffmpeg will simply fall back on the default bitrate (256K, I think), which will result in a constrained quality encode with extremely poor quality. Constant quality fashion tries to reach a... well... constant level of quality, using whatever bitrate is necessary to achieve that level of quality. This can result in very large file sizes, so is mostly not suitable for making webms intended for imageboards which typically have a file size limit of 10MB or less. Case command:
How seeking works in ffmpeg
ffmpeg has ii seeking modes:
- input file seeking (put the -ss Start earlier the -i input file)
-
ffmpeg -ss Get-go -i "INPUT.mkv" output.webm
This will take all data from the time specified at Outset. It starts transcoding from the specified time instantly, but the timestamps in the output file will be reset to 0, then if you lot attach subtitles, it volition transcode them from the beginning of the subtitle file. You tin likewise add the -t/-to options to specify an endpoint of transcoding, too.
- ouput file seeking (put the -ss Get-go subsequently the -i input file and earlier the output file)
-
ffmpeg -i "INPUT.mkv" -ss START output.webm
This will also take all data from the time specified at Starting time, however, it volition first transcode everything up to that indicate, but throw it abroad. This is slower than the previous selection, because of that seeking, but it does continue the timestamps in the output, then if y'all add subtitles, it will add the ones at the right time. Once again, you can use the -t/-to options to specify an endpoint of transcoding.
Computing the best bitrate to fit inside the size limit
4chan and 8chan limit file sizes to 4MB and 8MB respectively. To detect the maximum bitrate that volition keep your webm within 4MB, for example you can do a unproblematic calculation.
- (4MB/seconds)*8 = bitrate.
For instance, let's say you accept a ten 2d prune you want to postal service.
- 4MB/10 seconds = .4MB/south.
Since bitrate is measured in bits(b) and not bytes (B), multiply by viii to get the last bitrate:
- iii.2M.
Withal, the encoder is not e'er exact, so you may terminate up going over or under. Just adjust your bitrate and try again.
ii-laissez passer encoding
Yous may employ the 2-laissez passer encoding method in lodge to increment the quality of your video, at the expense of making the encoding process a picayune longer. During 2-pass encoding, y'all will make one "pass" through the video where the encoder merely collects information most the video you desire to brand a webm from, and then a 2nd "pass" where you encode the video for real utilising the information nerveless during the first "pass". The advantage of this is that the encoder knows what to expect when encoding the video and doesn't have to approximate whether the next frame is going to be a difficult frame or non depending on how difficult the previous frames were. This results in a improve allocation of bits, and thus meliorate quality.
Hither is an example:
- Start laissez passer:
ffmpeg -i input.mp4 -c:five libvpx-vp9 -pass i -qmin 0 -qmax 50 -crf ten -b:five 1M -threads 1 -tile-columns 0 -speed 4 -g 128 -aq-mode 0 -an -sn -f webm /dev/null - Second pass:
ffmpeg -i input.mp4 -c:five libvpx-vp9 -pass 2 -qmin 0 -qmax 50 -crf 10 -b:v 1M -c:a libopus -b:a 64K -vbr on -threads one -tile-columns 0 -speed 0 -automobile-alt-ref 1 -lag-in-frames 25 -1000 128 -aq-mode 0 -sn -f webm output.webm
Using filters with -vf
The -vf flag allows you to define 'filters' which can assistance you further manipulate the file. The syntax for this looks something similar -vf <filter>=<param>,<filter>=<param>. Use ffmpeg -filters to get a list of filters and how to utilize them. Some of the more common ones will exist explored beneath.
- scale: Calibration takes two arguments separated past a colon, which are width and height respectively. If you lot enter -one for either variable, ffmpeg will calibration the video based off of the aspect ratio of the source file. An example of this would be
-vf scale=640:-one, though it is preferable to use -2 which volition ensure that the resolution is divisible by 2.
- crop: Crop the input video to given dimensions. Takes iv arguments: width:top:left:top. For example
-vf crop=200:100:50:10volition crop a 200x100 rectangle 50px left from the border and x from the top.
- rotate: Takes ane argument in radians, can apply PI as a variable: For example
-vf rotate=PIvolition rotate a video 180 degrees,-vf rotate=PI/2will rotate a video 90 degrees,-vf rotate=PI*45/180volition rotate a video 45 degrees.
Common applications of ffmpeg
Metadata
To just impress metadata most a video file: ffmpeg -i input_file -f ffmetadata metadata.txt
To extract a snippet of video from a long video, all you need to exercise is input the time the clip begins and the length.
-
-ss START -t DURATION
Or, you tin can specify the end fourth dimension instead of the elapsing:
-
-ss START -to END
Time format of beginning and cease is generally hh:mm:ss.
Here's the ffmpeg tutorial on using the cutting option
Resizing
-
-vf scale=-ane:Acme
Hardsubbing
First, extract the sub file.
-
ffmpeg -i "INPUT.mkv" -an -vn -c copy "SUB.ass"
Add this to your options
-
-vf subtitles="SUB.ass"
Unfortunately, if you utilise input seeking it fucks upwards. Employ output seeking only.
Cropping
-
-vf "crop=WIDTH:HEIGHT:TOP:LEFT"
Joining clips together
To join ii or more clips, create a text file containing the name of the files like this:
file 'file1.webm' file 'file2.webm' file 'file3.webm'
Then call ffmpeg: ffmpeg -f concat -i files.txt -c copy output.webm
Opposite a video
Utilize the post-obit command to opposite a video:
ffmpeg -i input.webm -vf reverse out.webm
Downloading from Youtube
If you desire to download YouTube videos, use youtube-dl: https://rg3.github.io/youtube-dl/
GNU/Linux users can notice this in their package managers.
Download that and extract information technology wherever you want Open your command prompt (Windows+R and then type cmd and press enter) Paste these 2 commands: cd C:\folder\path\where\youtube-dl.exe\is\located youtube-dl.exe https://world wide web.youtube.com/ThisIsTheLinkToTheVideoYouWantToDownload
And that's it. The plan will start downloading the YouTube video. From here on you can trim information technology, resize information technology, etc.
There are too other alternatives, like http://en.savefrom.net/
More advanced ffmpeg use
Manipulating individual video, audio and subtitle streams
Each file is made upward of 1 or more than streams: video, audio. or subtitle stream(south). They's sometimes also called channels or tracks. Each stream in a file is numbered from 0 upwards. Stream types tin can also be accessed via the messages v/a/south for video/audio/subtitle respectively. Ffmpeg can likewise take multiple input files:
-
ffmpeg -i FILE.mkv -i OTHERFILE.mkv
Numbered in order from 0 upwards. Past default, if you just use i file, it will exist numbered 0.
ffmpeg uses the -map option to map multiple inputs to the ane output. For example, if yous want to map the audio and video stream of a file to the output file, y'all would practice this:
-
ffmpeg -i FILE.mkv -map 0:a -map 0:v OUTPUT.webm
-map 0:a means "use the audio stream of the get-go file. -map 0:5 says yous want to use the video stream of the first file
Just what if there are multiple streams of the same blazon? i.e. multiple subtitle streams? By default, ffmpeg takes the starting time of each blazon of stream, merely yous tin specifiy what you want:
-
ffmpeg -i FILE.mkv -map 0:a -map 0:v -map 0:ane:due south OUTPUT.webm
This side by side command tells ffmpeg to take the audio stream and the video stream of the first file, and the subtitle stream of the 2d file:
-
ffmpeg -i FILE.mkv -i FILE2.mkv -map -0:a 0:five 1:s OUTPUT.webm
Hither's the ffmpeg guide on using -map
Full general tips
- Bitrate is more important than resolution for a video's quality. Don't upscale your videos, increase the bitrate instead.
- Summarize your content equally much as you tin can. No demand to make 2 min WebMs if you tin can show what y'all wanted in 10 seconds or less.
- Don't post WebMs that are to a higher place 720p unless you know what y'all're doing. 720p and 480p are more than enough for nearly things.
- Don't record in 1080p only to downscale it afterwards. Record your screen in 720p or less.
- Don't tape at more than 30 fps unless you desire to show how expert your game looks at higher framerates.
- The more the camera moves, the bigger the file size you lot're going to get. When recording, try to minimize unnecessary camera movements.
- The more general movement there is on a video, the bigger the file size you're going to go. Even if your camera is standing nonetheless, if there are lots of things happening on your screen, the file size is going to increase.
- If the quality is not good enough, lower the resolution. A 720p at 500 kbps video is going to look worse than a 480p at 500 kbps video, even when you lot upscale the 480p video to 720p.
Bug
Seeking upshot with VP9
VP9 currently has a stupid default value (9999, i.e. space) for the maximum interval between keyframes, which can result in only a single keyframe being created at the very start of the video causing the following seeking issues during playback:
- Trying to navigate forwards through the video using the arrow keys on your keyboard causes the audio to skip ahead simply the video to freeze.
- Trying to navigate backwards causes the video to skip right back to the get-go frame.
- Precise seeking using mouse clicks is very slow; after clicking somewhere on the progress bar, in that location will be a filibuster of several seconds before the video actually skips to that point.
If you encounter this trouble, information technology is hands fixed with the -g selection. The default value in VP8 for this option was 128, and so try that first ("-g 128"). If seeking problems persist, endeavor lowering the interval further (e.thousand. "-yard 64").
Scripts and GUIs
Windows
Save these programs every bit a .bat file and identify them in the binder of the video y'all want to convert.
Video to WebM'
@echo off rem about 3megabyte in scrap 3*1024*1024*eight*0.95 set /A MAXSIZE=23907532 fix WIDTH=720 ffmpeg -i %one 2> webm.tmp for /F "tokens=1,2,three,iv,5,6 delims=:., " %%i in (webm.tmp) practice ( if "%%i"=="Duration" phone call :calcLength %%j %%k %%l %%m ) del webm.tmp SET /a BITRATE=%MAXSIZE%/%VSECONDS% ffmpeg -y -i %1 -threads 0 -sn -an -c:five libvpx -b:v %BITRATE% -vf scale=-1:%WIDTH% -quality best -cpu-used 0 -slices 8 -car-alt-ref 1 -f webm -pass 1 NUL ffmpeg -y -i %1 -threads 0 -sn -an -c:v libvpx -b:v %BITRATE% -vf calibration=-one:%WIDTH% -quality best -cpu-used 0 -slices eight -auto-alt-ref 1 -f webm -pass two %~n1.webm" del ffmpeg2pass-0.log > NUL goto :EOF :calcLength FOR /F "tokens=* delims=0" %%A IN ("%3") DO SET /A s=%%A FOR /F "tokens=* delims=0" %%A IN ("%2") DO Set /A south=s+%%A*threescore FOR /F "tokens=* delims=0" %%A IN ("%1") Do SET /A s=s+%%A*60*threescore set /A VSECONDS=s gif to webm
@Echo OFF ffmpeg -y -i "%~i" -b:v 3M -quality all-time -cpu-used 0 -slices 8 "%~one.webm"
Linux / Bone X
If you lot're using Os Ten or Linux, you probably know how to salve and execute these scripts already, but hither's a quick overview:
- Create a file, such as
~/bin/my_script.sh - Copy and paste the code into this file with your favorite editor.
- Open up a shell. Run the command
chmod +x ~/bin/my_script.sh - The script can now exist chosen as
~/bin/my_script.sh some_file.typeor if you lot take your PATH gear up correctly,my_script.sh some_file.blazon
webm.fustigate
It does interactive cropping with mplayer, interactive selection of starting time and stop times with mplayer, hardsubs, and has many more than options.
https://gist.github.com/interjection/4b83c0790ce82982caec
.gif Catechumen
#!/bin/bash ffmpeg -i $1 -threads 0 -cpu-used 0 -c:v libvpx -f webm -b:v 700k -quality good -qmin ten -qmax 42 -an /dev/null ffmpeg -i $i -threads 0 -cpu-used 0 -c:five libvpx -f webm -b:v 700k -quality skillful -qmin 10 -qmax 42 -an "$F"
High-Terminate Video Catechumen
#!/bin/bash # Warning: this script will probably have up a lot of CPU usage. Don't crash your machine. ffmpeg -i $i -threads 0 -cpu-used 0 -c:v libvpx -c:a libvorbis -ac two -qmin 0 -qmax 10 -bufsize 1000k -quality practiced -crf iv -b:v 2M -pass 1 /dev/null ffmpeg -i $1 -threads 0 -cpu-used 0 -c:v libvpx -c:a libvorbis -ac two -qmin 0 -qmax 10 -bufsize 1000k -quality good -crf 4 -b:five 2M -laissez passer 1 "$1".webm
̈́Separate Video
#!/bin/bash # Takes a large video file and splits it into multiple 3MB webm files crf=xviii bitrate=500K threads=viii # Duration of original video in seconds duration=$(expr `mediainfo --Inform="General;%Duration%" "$1"` / 1000) sec=0 j=1 until (($sec >= $duration)) do ffmpeg -ss $sec -i "$1" -an -sn -threads $threads -c:5 libvpx -crf $crf -b:v $bitrate -fs 3M $j.webm # Elapsing of previous video is added to the sum of every previous video sec=$(expr $(expr `mediainfo --Inform="General;%Duration%" $j.webm` / chiliad) + $sec) j=$((j+1)) done
Poster Image with Audio
ffmpeg -r 1 -loop 1 -i 1.png -i 1.wav -c:five libvpx -c:a libvorbis -b:a 64k -shortest out.webm
GUI options
Recorders
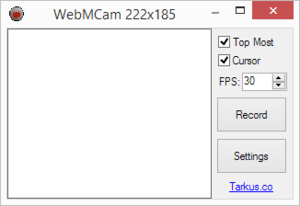
- WebMCam
- Records the selected area and saves the output as WebM, simply similar GifCam does it with GIFs.
- https://github.com/TheTarkus/WebMCam/
Converters
- convert_script.lua - A lua script for mpv to convert, crop, resize and encode directly from the mpv window.
- https://github.com/Wsheerio/webmConverter
- https://gitgud.io/nixx/WebMConverter - Most up-to-date converter for Windows.
- https://github.com/rzumer/Webbum - As well supports AV1
- https://firefogg.org - Requires the Firefogg extension, volition merely piece of work in Firefox.
You lot tin also refer to Recommended_software for video editing and converting programs.
External resource
List of stickies / exam threads
- https://rbt.asia/g/thread/S41184007
- https://rbt.asia/g/thread/S41183707
- https://rbt.asia/chiliad/thread/S41178861
- https://rbt.asia/g/thread/S41190521
- https://rbt.asia/one thousand/thread/S41212767#p41212767
Further links
- https://trac.ffmpeg.org/wiki/vpxEncodingGuide
- WebM of a WebM tutorial: https://rbt.asia/boards/g/img/0411/75/1396646705233.webm
- http://www.webmproject.org/docs/encoder-parameters/
- http://wiki.webmproject.org/ffmpeg
- N0Lif3's Windows tutorial: https://www.youtube.com/sentinel?five=WeM3SUp-HRg
- http://wiki.webmproject.org/ffmpeg/vp9-encoding-guide
- https://github.com/Kagami/webm.py/wiki/Notes-on-encoding-settings
- https://trac.ffmpeg.org/wiki/Encode/VP8
- https://trac.ffmpeg.org/wiki/Encode/VP9
- http://forum.doom9.org/showthread.php?t=168947
- http://slhck.info/video-encoding
- The "ultimate webm guide" for ffmpeg: https://github.com/vp8m8/webm-guide
Source: https://wiki.installgentoo.com/wiki/WebM
Posted by: davisupichoughbor.blogspot.com
0 Response to "Can I Upload A Large Video To 4chan"
Post a Comment